Check out my new blog, I AM Zech.
--Update--
Click images to see full quality versions
Today, Technicolor publicly released their much anticipated "CineStyle" for canon cameras. This new style supposedly replaces the inefficient rec. 790 capture with a more efficient LogC pattern. To see the difference check out this video or read up on rec. 790 here.
Although this is optimized for the 5D and many other bloggers will probably do the same thing, I decided to see how it performed on the T2i. I usually use the Superflat picture style on my T2i and since I have gotten the best results with that I decided to compare to Superflat instead of any of the ones built into the T2i.
For my tests I set up two scenes. The first one consisted of random things on my desk: A CD, a stuffed cat that my amazing girlfriend got for me, a ceramic dragon, a dollar bill, and whatever else happened to already be there.
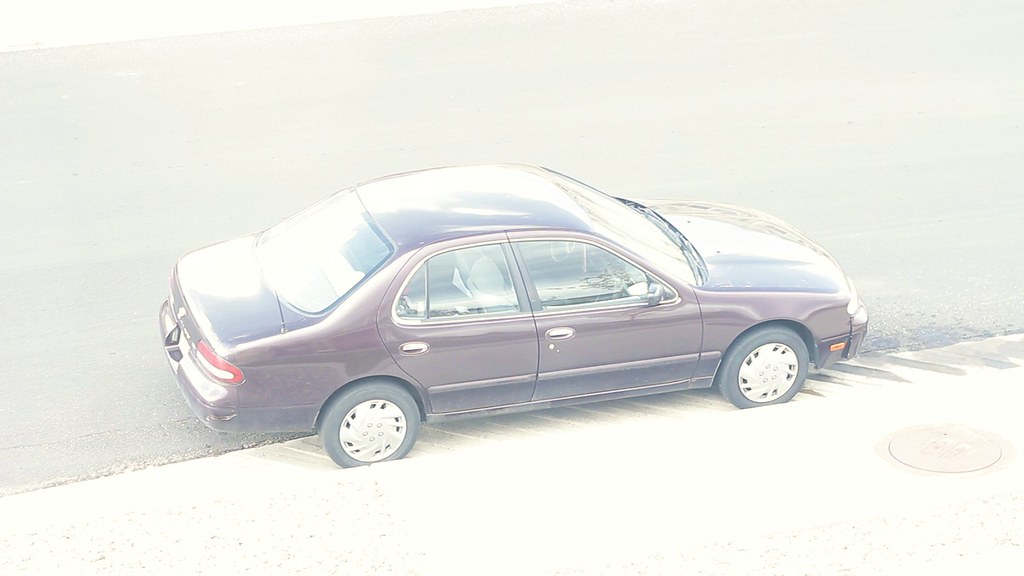
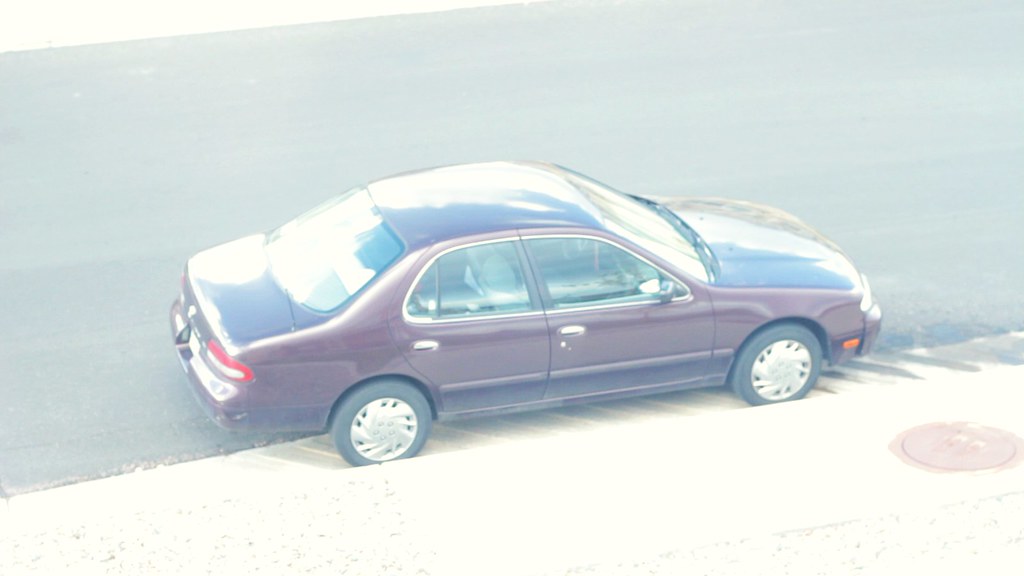
The second scene was out my window which was a view of my car.
It was all shot using a 50mm f/1.8 and exposure was kept the same for each shot. Color correction was my generic settings, tweaked very slightly to accommodate for differences in dynamic range.
All of this consisted of video, which still frames were pulled out of.
Click images for full sized versions
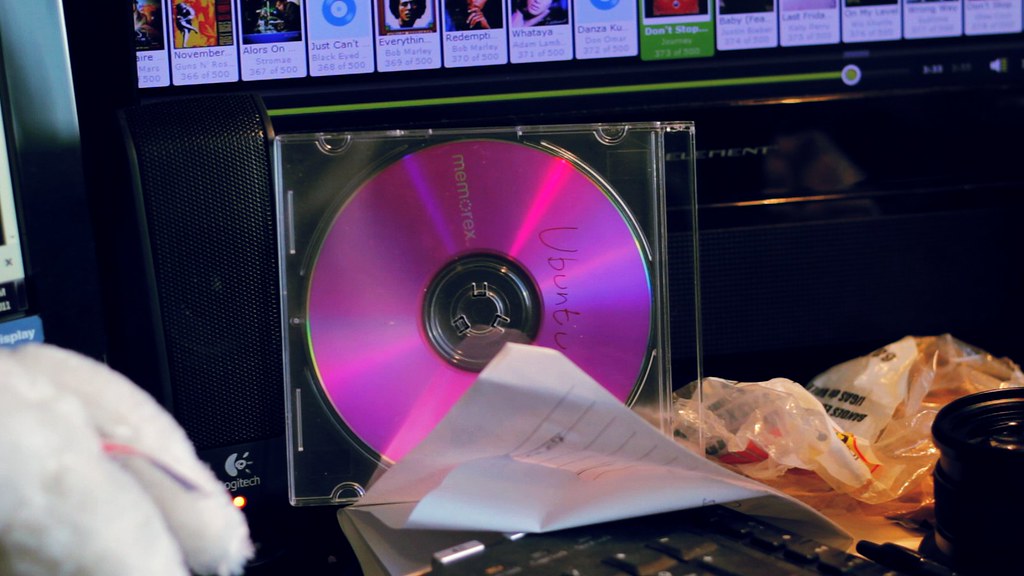
First up is the CD:
Technicolor Cinestyle:
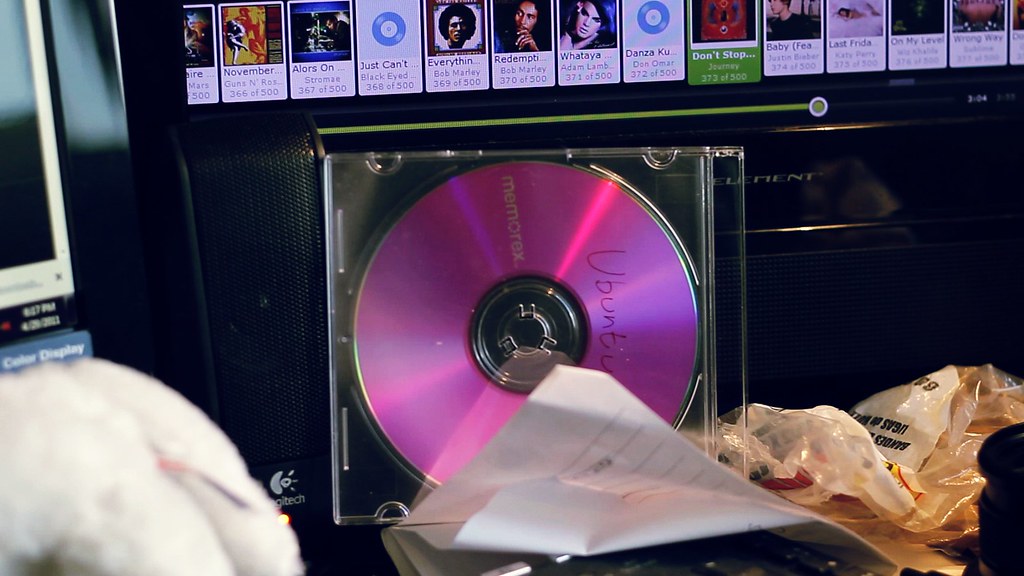
Superflat:
The stuffed animal:
Technicolor Cinestyle:

Superflat:

The dragon and dollar:
Technicolor Cinestyle:

Superflat:

And my car:
TechnicolorCinestyle:
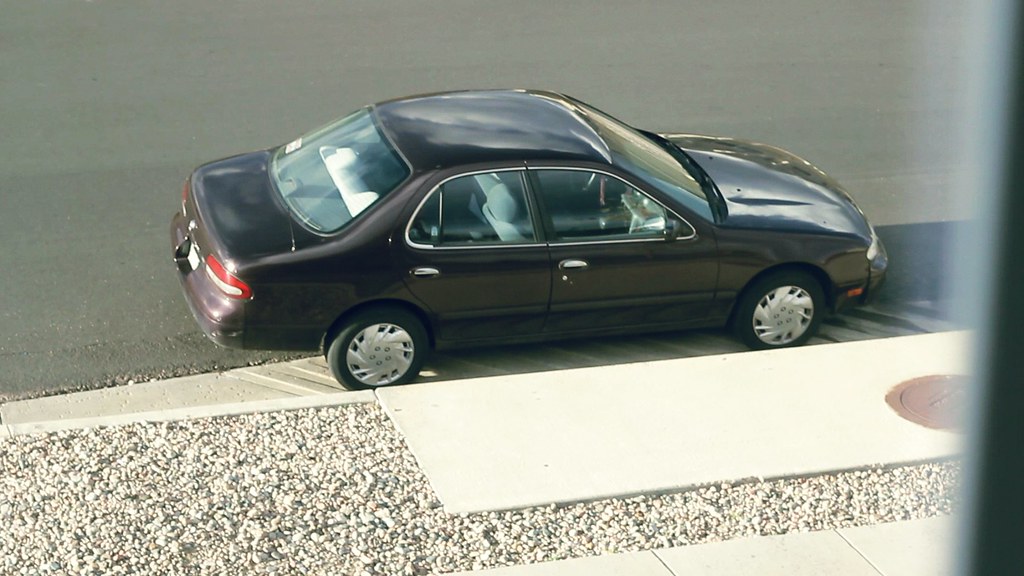
Superflat:
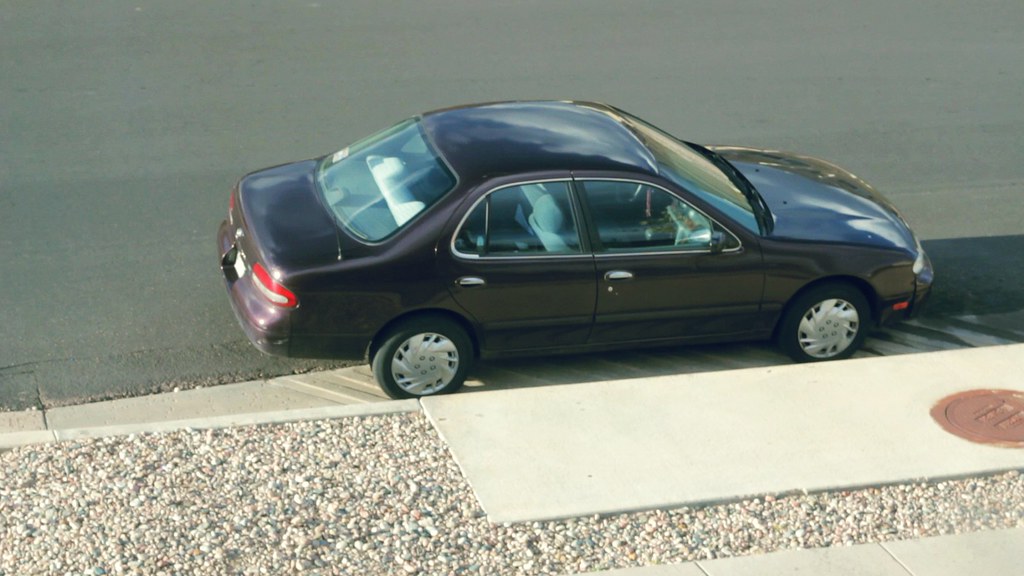
As you can see there is little to no difference between the two, except a little extra "punchyness" in the dollar bill and the car with Cinestyle and Superflat produced a softer image, although all the settings were

The CD corrected: 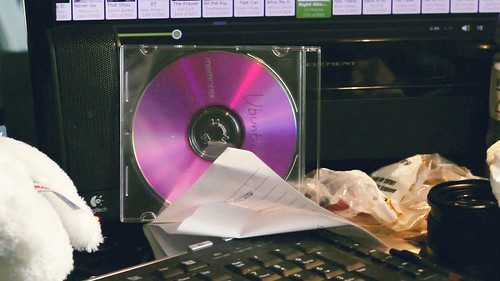
Superflat: 
Superflat: 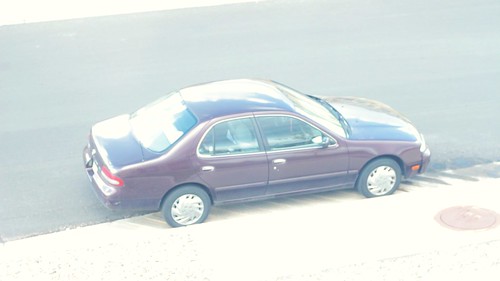

Superflat:
identical. So I decided to push the picture profile to its limits, the curse of any HDSLR... Over exposure and under exposure.
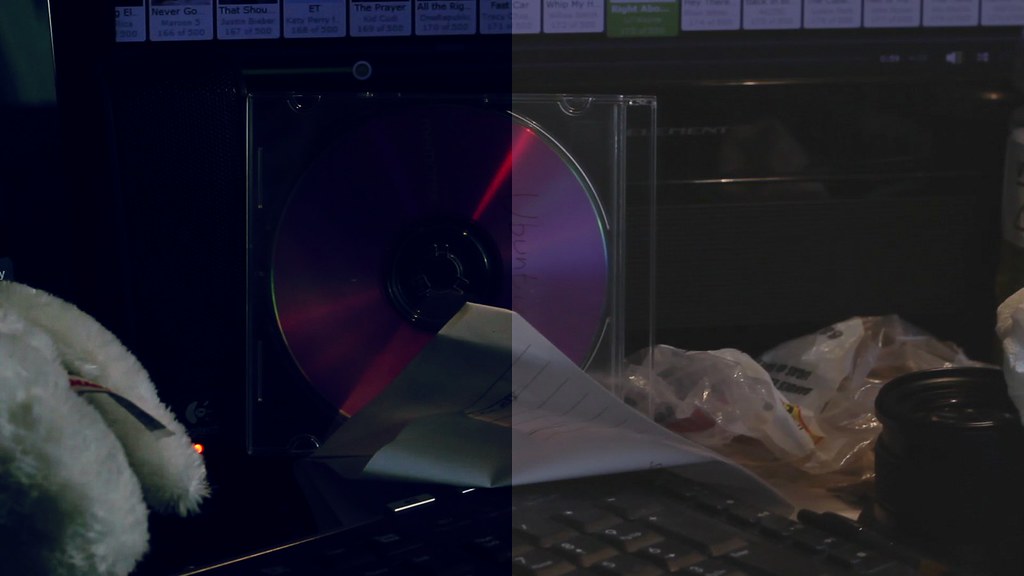
First under exposure. For this I ran the images through my standard color correction settings as before, but due to the added contrast just making everything too dark to see anything, I cut out half of the frame to be un-color-corrected. Then I tweaked curves to get the best possible image with proper exposure. Since they were generally all the same, I've only included the CD, which was most telling.
The CD:
Technicolor Cinestyle:
Superflat:
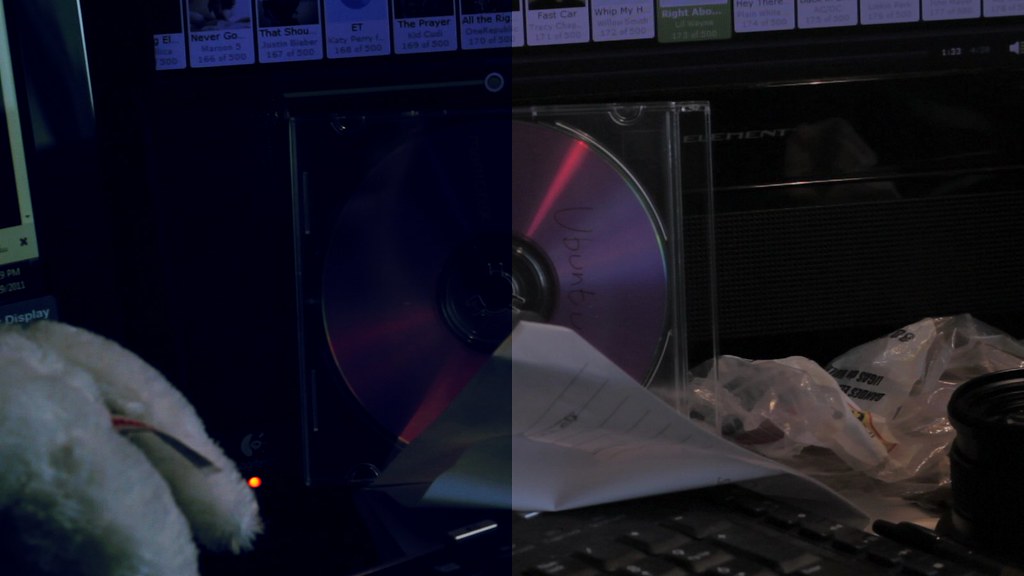
The CD corrected:
Technicolor Cinestyle:

Superflat:

We can see that the Technicolor Cinestyle has more detail in the shadows on the unprocessed image. Also looking at the corrected images, the Cinestyle held its color better and has less noise (look at the black bar on the very left of the frame.)
Finally I shot video of my car overexposed and corrected exposure using curves.
My car overexposed:
Technicolor Cinestyle:
Superflat:
And my car corrected:
Technicolor Cinestyle:
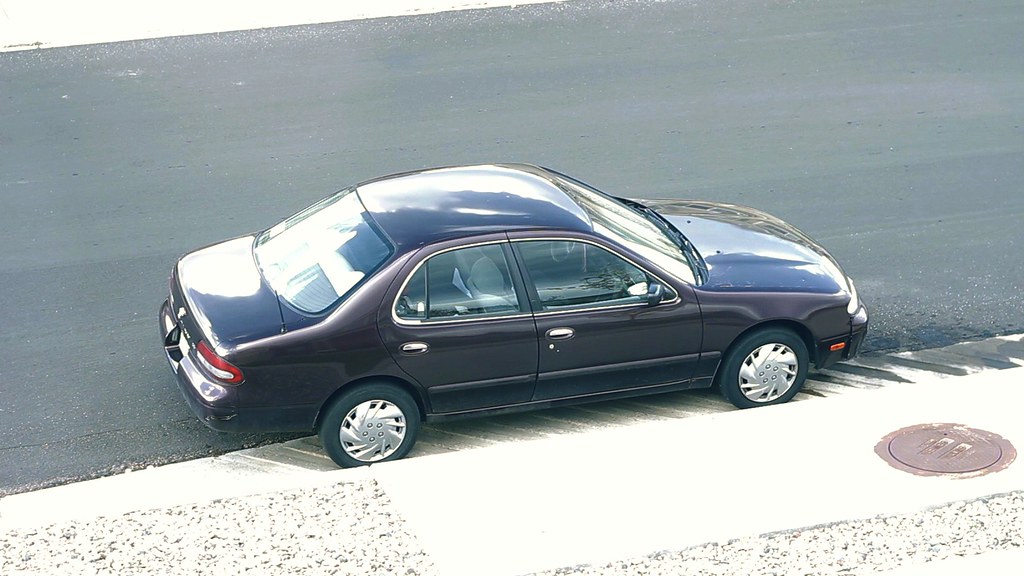
Superflat:

This test is most telling. When overexposed, the Superflat lost all sharpness, but the Technicolor Cinestyle not only kept all sharpness, it kept all its color as well and actually produced a usable image.
OMG THANK YOU SO MUCH, you have made my dreams come true no joke. Thank you so much. Dear god. 1 billion gratitude points for you!!
ReplyDeleteLol. Your welcome. Glad I could share. I would have settled for half a billion gratitude points.
ReplyDeleteThanks for this! Very helpful. Installed Technicolor now over Superflat. Can't wait to test.
ReplyDeleteThis is MENTAL. Greats tests, getting it on my T2I right away!
ReplyDeleteThank you so much for the great article you posted ! I translated it with the one from Vincent Laforet for the french DSLR community and posted on my blog, giving you all credits and pointing on your blog for the photos. I hope you don’t mind.
ReplyDeletehttp://motionblur.fr/archives/3509
Stephan
Did you have issues installing the picture style? Cuz I'm in manual camera settings the style shows in user def but in video mode it doesn't - it shows standard.
ReplyDelete@stephan, Not at all! glad I could help.
ReplyDelete@reynaldo, I had no problem with it, but some people are reporting that you need to take the card out when you install it if your using magic lantern.
Also make sure that when you go into settings>camera 2>picture styles> and press menu over one of the user defined, that its set to CineStyle.
The log style from Technicolor is designed to be graded with a log LUT... check this out:
ReplyDeletehttp://www.motionfx.gr/workflows-lut.html
If you use a real Film Log LUT to grade you will transfer the Films aesthetics to the image... for generic Log LUTs check this at the bottom:
http://www.motionfx.gr/order-now-lut.html
Zech - Thanks was able to do some digging, this resolved it. http://goo.gl/yJDh2
ReplyDeleteWhere is the .LUT plugin once you put it in the Plugins folder for FCP?
ReplyDeleteQuestion: did you use the same contrast, sharpness, and desaturation settings on each picture profile? I'm wondering if the superflat had sharpness all the way down, and Cineflat had it on normal.
ReplyDeleteHi Zech,
ReplyDeleteI couldn't find your e-mail anywhere. Please contact me here: admin@cinema5d.com
Thanks,
Sebastian
@Reynaldo, Glad you got it working, let me know what you think of it
ReplyDelete@Tarik, I wouldn't know, I used Sony Vegas, and since Vegas doesn't have any support for LUT's (that I know of) I just modeled and S-Curve based on the LUT file. Open it with a text editor and graph it to see what I mean.
@HansNfranZZZ, All Picture Profiles were set to 0,-4,-2,0 and the same for my next test. I didn't do any sharpening in post either.
thanks for great comparison
ReplyDeletefor all guys how lost their EOS Utility CD here a link to download it
http://www.filefactory.com/file/cb00394/n/CanonEOSUtility.iso
Zech many thanks for that, it shows clear diferences with super flat.
ReplyDeleteNow, I'm having trouble trying to install the LUT.
How do I do that I've never used LUTs and always corrected step by step in Looks or FCP.
IT might sound dumb but what do I have to do???
Thanks.
@Nicolas Macario Alonso, Skip the plugin, its probably more hassle than its worth, and check out my most recent article. Its a video blog of how to use the LUT file without a plugin.
ReplyDeleteHi Zech, I have a problem, maybe you can help me:
ReplyDeleteWhen I'm in the utility and click the folder symbol to download the color profile it's just grayed out and it doesn't react.
My T2i is turned on and connected, everything looks normal.
@Tyler Jan Becker, Is your camera in [M] mode? Are you switching to one of the User Defined profiles first? Also you may want to check out This Thread.
ReplyDeleteIf your still having trouble, take some screen shots and email them to me: ZechProductions@gmail.com
Thanks Zech, I figured it out and was about to post again. I had the camera on movie mode. Here's the result of my little test:
ReplyDeletehttp://www.vimeo.com/23283550
pleas zech i cant download the cinestyle profile, its not avalibale in my country pleassssss send it to me i realy apresiat this pleasssssssssss
ReplyDeletelocoboy_dz@hotmail.fr sorry for my english ^^
I installed this on my 5D when it first came out and it looks WAY different than the results you got. I mean even if you set it on neutral, with sharpness at 0 and con/sat at -4 it isn't even half as neutral as the cinestyle profile.
ReplyDeleteI'll tell you this, traditionally any of the Magic Bullet Looks presets were WAY too much for DSLR footage, either too saturated, too contrasty, etc. But when I apply the presets to footage with the Cinestyle profile, it's almost not enough.
Canon says straight up "the video may even look undesirable, but it is the best starting point for grading" or something along those lines.
@906c5126-7fcf-11e0-829b-000bcdcb8a73, First off, please at least use a screen name. Nothing makes me want to ignore a message more than a random number.
ReplyDeleteSecond, yes the CineStyle profile is EXTREMELY flat. The flattest profile I have ever used. All my images are after a good amount of grading.
If your having trouble getting enough grade out of your image, try adding the LUT file, either with LUT Buddy or by defining your own custom curve, which I outline both with video tutorials in other posts. The video coming right out of the camera is absolutely ugly! but the graded footage is beautiful.
I'm curious, why do you have to install the Technicolor profile? Can't you just set those settings manually? Or is there some sort of processing that takes place through Technicolor's settings?
ReplyDeleteThe Technicolor CineStyle does alot for the phone compared to simply lowering contrast and saturation. Install it and try it out, it'll make much more sense trying it than me trying to explain it.
ReplyDeleteColor correction by using color gels, or filters, is a process used in stage lighting, photography, television etc......
ReplyDeletecolour correction
in GroupDMT
god
ReplyDelete