I'm excited to announce that I have joined forces with a fantastic editor and digital cinema enthusiast, Jonathan Madrid. To take our work to a more professional level, we have started our own media company, called Madrid Williams Media. I built the logo and the website.
If you are in the Colorado Springs area and looking for affordable, profesional video production then drop us a line at www.MadridWilliamsMedia.com
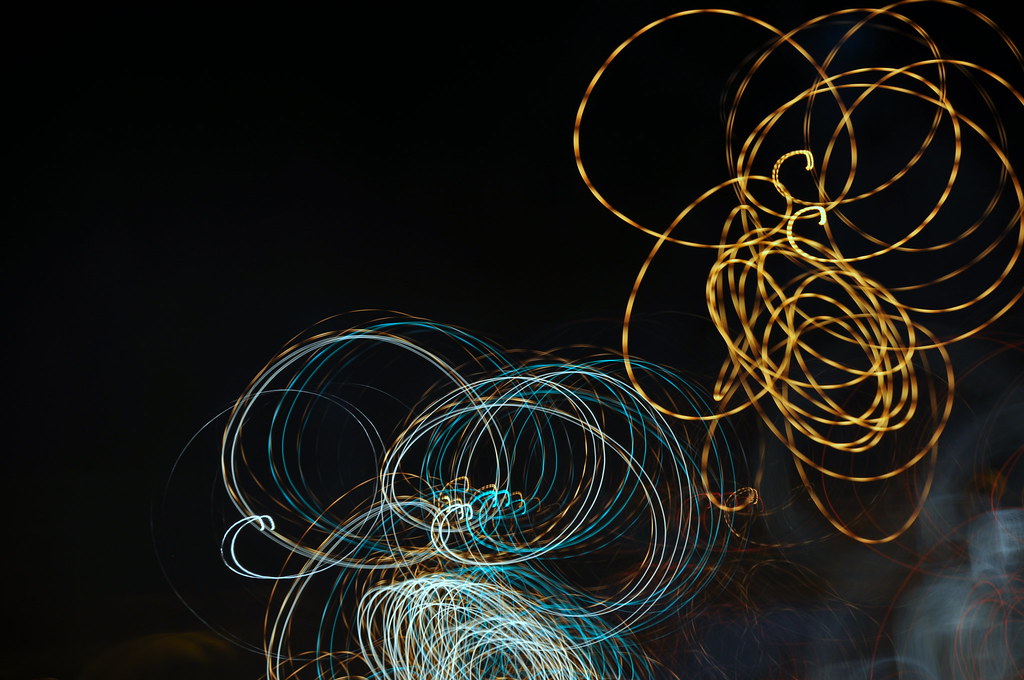
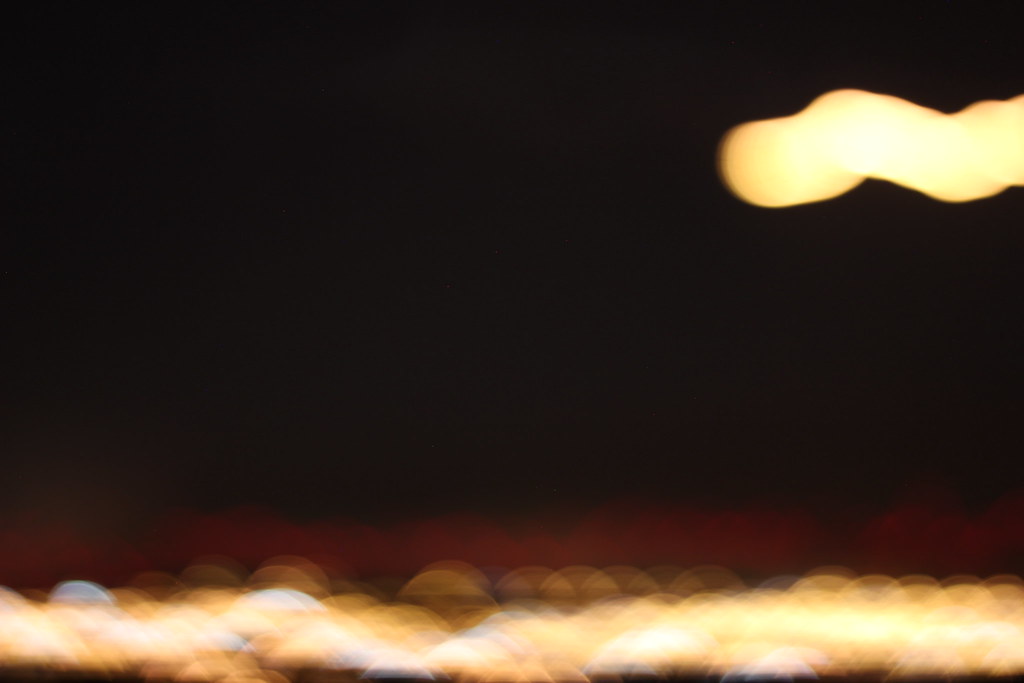
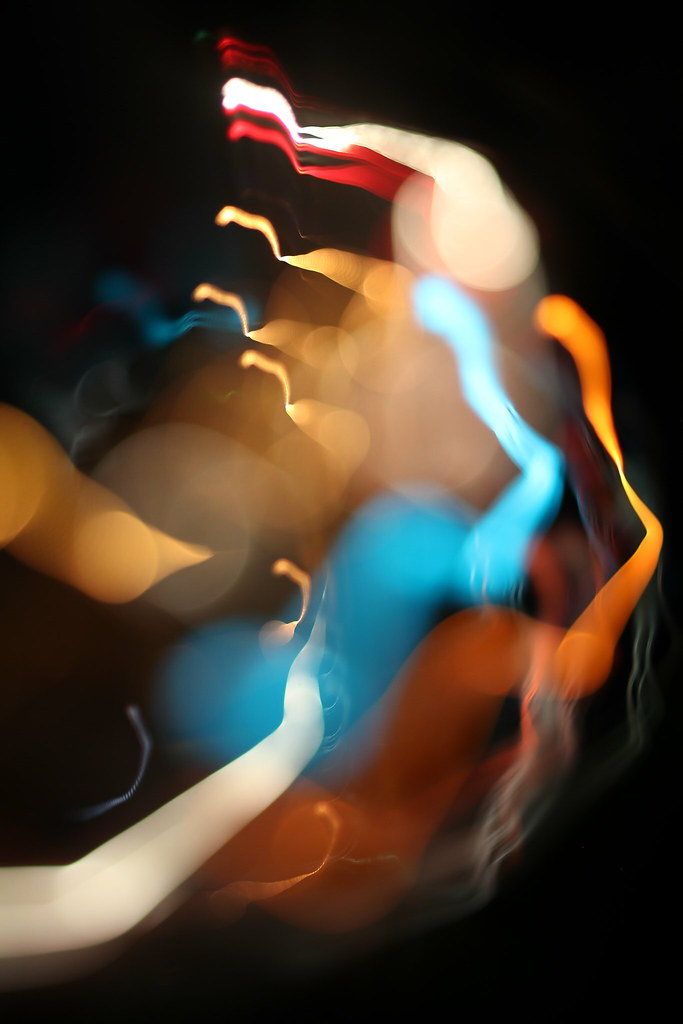
One of my favorite things to do on a long car ride, while someone else is driving of course, is to take long exposures of the street lights and headlights around me. By doing long exposures, anywhere between 10 and 30 seconds, and moving the camera around and adjusting focus, I can get some great looking abstract photos.
I hope you enjoy these photos that I took Saturday night on the ride back from my brother Jeremiah's graduation party. Congratulations to him for graduating from CU- Boulder!
Tomorrow my older brother is graduating college, and I want to be able to capture photos of him getting his diploma so I went to grab my longest lenses, one is 500mm prime and the other is a 70-300mm zoom. As not to look like the awkward photographer, I decided to just take one. But which one?
The 500mm prime has a much sharper image and longer length, but it only opens to f/8 whereas the zoom opens to f/4, two whole stops. I decided to take the 500mm as long as I could get enough light.
The "Sunny 16" rule states that on a day with direct sunlight, set the f-stop to 16 and the shutter speed to reciprocal of the ISO. There is another rule that states, don't ever shoot at a shutter speed less than your focal length.
Knowing all of this I know ill set my f-stop to f/16, my shutter speed to 1/500s and my ISO to 500. With these settings I know I can get a properly exposed shot that's not gonna be blurry and not too noisy (I know photos look good up to 800 ISO and I can get away with 1600 ISO).
But what if I want a lower ISO for a cleaner picture? Well since the minimum f-stop of the less is f/8, I know I can, but how much more?
All I have to do is know stops. Stops are units of exposure which you can translate into any of your three exposure options. To add or subtract a stop from ISO simply double or half it, and the opposite is true for shutter speed. To do the same for f-stop, its 2 stops for each time you double or half it.
So going from f/16 to f/8 is two stops, and knowing ill stay at 1/500s, I can half my ISO twice, giving me 125. Which means ill be able to get a low ISO shot if I want.
Needless to say I packed the 500mm prime and will be taking pictures in the morning.
--Update: Technicolor took town the LUT file and replaced it with a .mga file. This should work just the same in LUT buddy without the "changing Pattern" workaround.--
Yesterday I covered how to use a LUT file without any plugins, but was informed that some editors don't have support for custom curves. So I downloaded a trial of Premiere, since I don't have a Mac, I cant test Final Cut, and fiddled around with LUT Buddy till it worked. The secret? Upload your LUT file in setup, then change the "Action" to "Draw Pattern", then the "Pattern" to "3D 64", and then the "Action" back to "Apply LUT". And that's it!
Here is my quick video tutorial showing how to do it in Premiere, but hopefully it works the same in Final Cut:
The only change I would make is putting the LUT file somewhere in the Adobe directory, or other location you know will continue to be around, instead of with the project files so it doesn't get deleted or lost when you move on to another project.
Using the LUT file provided with Technicolor's CineStyle picture profile is essential, but some editors, including Sony Vegas, don't have a plugin for LUT files.
Here is a video tutorial that I made explaining how to use the LUT file without a plugin.
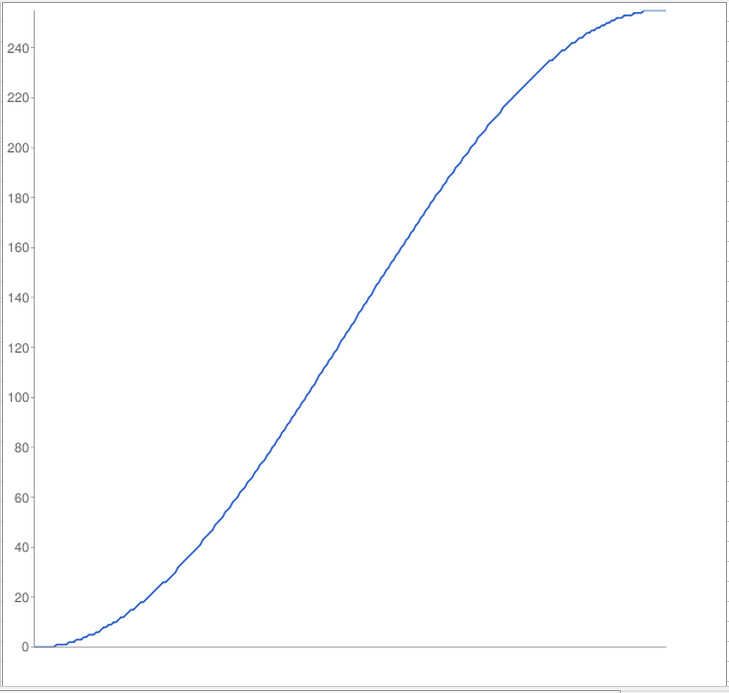
This is the graph of the curve defined by the LUT file. Reproducing this replaces the need for a LUTplugin.
And don't forget to save it as a preset for later use.
Here is the image before and after the LUT defined s-curve. Click for full size.